If you are looking to replace your mechanical hard drive with a brand-new Solid State Drive or just want to upgrade to a larger capacity spinning-disk drive with your Operating System completely migrated, this article will show you several ways to get the job done :) !

Most of the times you sure want keep all your files and folders intact during the upgrade, meaning data stay the same way they are on the new storage device as they were on the old one. In that case you will need to use a program that can take the exact snapshot of your current data drive and mount that identical image onto the new device.
Duplicating hard drive content is a simple work unless if you do not have the right tool to work with, the disk cloning progress could be quite difficult. You cannot simply drag and drop folders from old drive to a new one, it will not work because there are no boot records. One mistake and it could stretch a very long way, you never want to lose all your precious data from a mis-click.
However, worry not. All you need is paying close attention and proceed with care.
1. Tools and Preparation You May Need
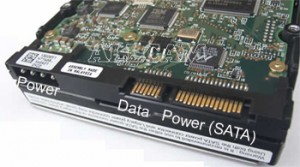
Hard Drive SATA Interface
credit : allcam.biz
For Desktop Computer : If you are replacing the old drive with a new a 3.5″ Mechanical Hard Drive or 2.5″ Solid State Drive, you can connect it to the motherboard via one of the available SATA Ports.
You should already notice there are two different connectors on the back of a SATA drive. The long plug is SATA Power connector that can be found from the Power Supply Unit, and the shorter one is for SATA Data cable that connects directly to the SATA Port on the motherboard.
All you need in this scenario is just a SATA data cable. If you do not have any spare SATA data cable or extra SATA power plug from the power supply, you can borrow them from the Optical Drive, but be sure to return them after you finish. The computer will recognize the new hard drive immediately after the boot.
On the other hand if you do not want to work with your new drive internally, you could use Kingwin USB 2.0 to SATA and IDE Adapter below to connect it externally via your USB Port.
For Laptop : It is not easy to install a secondary drive into a laptop to do a disk clone, because you probably do not have an extra drive bay for it. In this case you need an external disk drive usb adapter that allows you to connect your new drive to the laptop.
Since you have to buy an adapter, you might as well try to choose one that comes with a disk cloning software. Thus, you can skip the next two steps completely. One product I’m aware of and been using occasionally is the Notebook Hard Drive Upgrade Kit by Apricorn. The kit is inexpensive and its included application is super friendly to use.
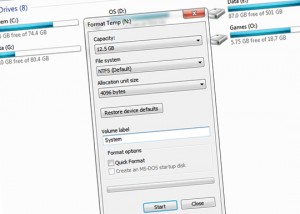
Now once you successfully connect your new storage device to your system, open up My Computer and right click on your new drive.
You have to format it under NTFS system just to make it ready for the cloning operation.
2.Software for Disk Cloning
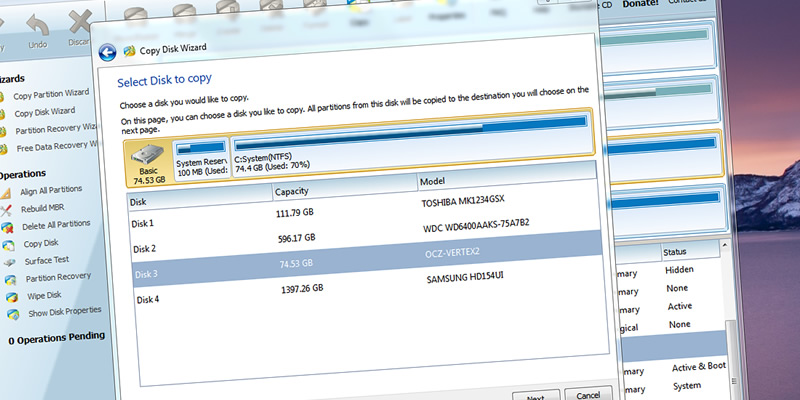
There are several premium disk cloning programs for the purpose, but I do prefer you to try these two free software first : MiniTool® Partition Wizard by MiniTool and DriveImage XML Backup Software by Runtime Software.
I have been using them since forever to fix everyone’s computer in my family. Both of these programs are very easy to use with details explanation on each step of the process.
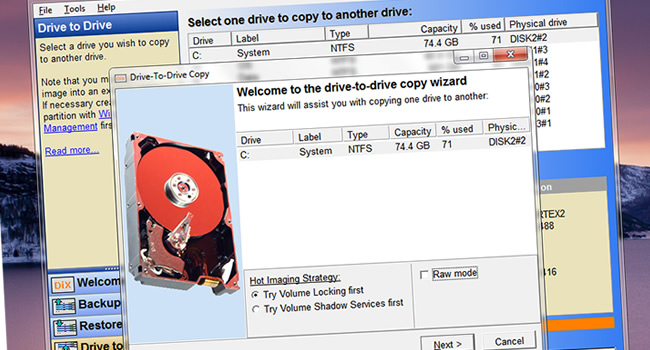
They provide more features than just disk cloning such as resize partition, copy partition, align partition, etc..You can learn about those functions later but in the mean time your main focus should be with is MiniTool® Partition Wizard‘s Copy Disk Wizard and Drive to Drive of DriveImage XML Backup Software. The feature comes in different names but both do a similar job, which is taking snapshot of one drive and flashing that image onto another.
With Copy Disk Wizard utility, you just have to follow the guide step by step and read the on-screen instruction carefully. When the task is completed, I highly recommend you to run Align All Partitions option to properly calibrate your new storage device, especially for Solid State Drive. I’m really glad that MiniTool has designed this helpful software so intuitive and easy to navigate, all at no cost. You probably want to give them a small donation as a token of appreciation, if this program does help you out one way or the other :)
Now if you do not want to use MiniTool® Partition Wizard for some reason, you can choose the second aforementioned software. It does look a little more technical with DriveImage XML Backup, but it’s still very easy to use. Once you launch, you will see the the Welcome screen that introduces different abilities the program offers. You should immediately notice the fourth bullet that says “copy directly from drive to drive“, it is the method that you will be using to clone your current drive. The rest is extremely self-explanatory ! Leave me a comment if you have any question at all.
3.Alternate Option
 XXclone is also a very free disk cloning program that you may also be interested in. The interface is minimalist and straight-forwarded. The reason it was not mentioned above is because I do not want to overwhelm you with too many choices. It is better to narrow them down and try what you have, instead of what there are.
On the flip side, if you do not want to play around with technical software too much, you still can clone your drive effortlessly with one of these Disk to Disk Clone Docking Stations below. All you have to do is drop your old drive into the first slot, new one to the second slot and press the little button, then wait until the work is done. Awesome right? But it’s not free like any options above :(
4.Side Note
If you are replacing your conventional hard drive with a Solid State Drive using any method above, I recommend you to read further into 3 Easy Steps to Optimize Solid State Drive. The article will teach you how to enable AHCI Mode in your Windows registry instead of SATA/IDE Mode of the old mechanical drive. This will tremendously increase the performance of the Solid State Drive.

You should already notice there are two different connectors on the back of a SATA drive. The long plug is SATA Power connector that can be found from the Power Supply Unit, and the shorter one is for SATA Data cable that connects directly to the SATA Port on the motherboard.